Menu

Show posts

This section allows you to view all posts made by this member. Note that you can only see posts made in areas you currently have access to.

Show posts Menu

Topics - eri0o

#1

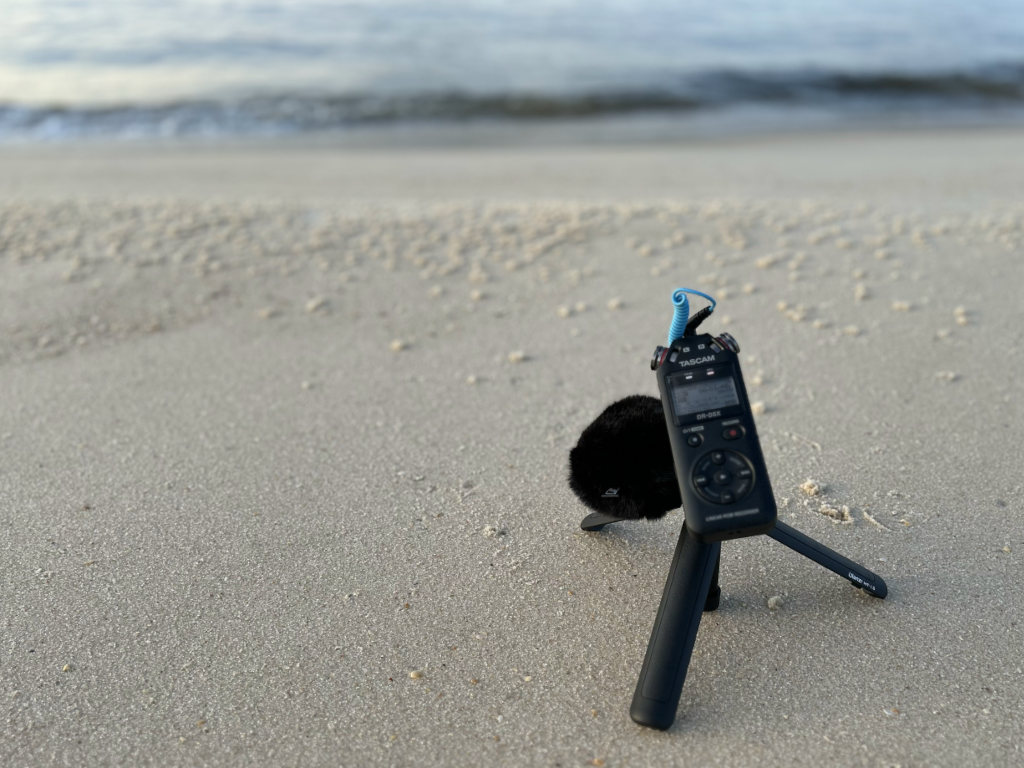
the setup I used in the place it recorded

Hi everyone, I just wanted to write here about a new hobby that I just got into. I have been involved in a few projects recently at work that requires me to spend a lot less time in the operational areas I used to be in, and a lot more time on the computer, in meetings, reading, and writing a lot.

Since I am now sitting in front of the computer a lot during the day, this means it has been a little hard to keep myself on a computer after work to do the other things I enjoy (like AGS!). As I get older, sitting a lot makes my back unhappy. I also have been thinking a lot that I need to get out of the house more - and I live in a place that has a lot of nature around too.

When I made I Rented a Boat and Don't Give Up the Cat, I spent some time in both games adding some environmental sounds. I like the result I achieved, but both times I had a little trouble finding exactly what I wanted for these sounds, there weren't a lot of royalty-free resources that also felt how I wanted.

I recently also tried to make another game similar to these two, its temporary nickname was Sandwalker, but I failed. One of the things that I made hard for myself in this game was the sound design. Since it was in a desert, I noticed there weren't a lot of sounds there that were interesting for me - it seems deserts are great for amplifying the sound of things you are carrying, but not much beyond this, even the animals don't produce much sound there. So I canned the project.


the sandwalker prototype.

I want though to create new small games in the natural environment that makes me happy, with a very green forest and a big ocean around it - it's just what is around my home, so it's also what I know too. So I started again to experiment with this.

But when I tried again to design an interesting map I found myself failing at finding the sounds that I wanted. So it got on me, that I should just capture the sounds myself! I knew I couldn't just use my phone, for whatever reason it doesn't like environment sounds too much, I tried to capture sound waves before with it and they just didn't end up sounding right. So I started to read online and discovered there is even a name for this thing I wanted to do, "field recording", and started devouring a few niche sites about it.

In the end, I noticed the sky was the limit spending wise in different hardware available. So I looked in different places, including some local stores from where I live, and started to track gear down in a notepad to assemble a starter kit. I ended up with the list below, as something that would not break the bank and also that I could get quickly so I could just try on the next weekend.

  • Tascam DR-05X is a handheld recorder that uses a 3.5mm TRS connector for an external microphone.
  • Tourmate Hard Case for DR-05X, helps me transport things in a compact Case
  • 4 Toshiba rechargeable batteries, it's the same battery type I use around the house for Gameboys and remotes.
  • Ulanzi Mt-16, a small and portable tripod
  • Sennheiser MKE 200, a small and portable microphone (It also comes with a windshield!)
  • Windshield for the Tascam DR-05X microphones, the cheapest I found
  • sony mdr xb55ap, earbuds for listening directly from the Tascam DR-05X
  • 1 64 GB Sandisk micro SD card

I ended up buying all through the internet - even in local stores - as I noticed the estimated delivery times were all reasonably short. The last thing to arrive was the micro SD card, and none of the micro SD cards I had at home were working in the DR-05X recorder - got the dreaded Invalid Card error no matter what I did. I also discovered that the DR-05X doesn't output any sound if there is no micro SD card, even when not recording. Of course, the micro SD card only arrived late Friday afternoon.

This Saturday morning, I woke up really (really) early and went to give a shot at one of the nearby beaches. And I forgot my earbuds, so I sat and recorded the waves and also walked around a recorded a few birds, having no idea if I was doing anything right and fiddling with the levels reading the graphics in the recorder screen until it didn't hit peak. As I got home it was a long day filled with other things, but now I get to sit down and listen as I write this. So, I didn't correctly select the input of the right mic in a few recordings, and some other stuff didn't sound too well, but at least some waves got more or less alright - although, a lot of birds ended up in the recording too.

There was one recording where I got the level config somewhat better than the others, I loaded up that one on Audacity, added a small fade in and fade out at start and end, and exported it to an Ogg file that I think is game (and AGS) ready. You can listen it here!

I think I will need to wake up very early for some time now to get the sounds - its a window where there are no other people around to make sounds that I don't want and that I also don't have to be doing something else, since everyone else is sleeping yet.


That's all for now, thanks for reading!
#2
https://cirrus-ci.com/task/4965409310375936

Hi,

The builds of AGS Editor and Engine for Windows have been built using Visual Studio 2015 for quite some time now.

I am upgrading the continuous integration to use Visual Studio 2022 instead to provide builds. This means when the AGS Editor requires a VC Redistributable it will now use a different one.

Please try the builds linked from the CI on here and check if they work the same in your computers. I only tested in a Windows 11 Sandbox, and it seems it worked there for me.

It would be nice to know if Editor and Engine are working in different Windows OSes too and also checking in different people machines.

Thank you!
#3
Some enums support being used like flags - meaning you can do bitwise boolean "or" operations to them to use as input in some functions. Currently in the engine there is InputType and RenderLayer - there may be other recent ones I am forgetting.

The issue is there is no symbol/keyword that gives some "contractual" awareness they can be used in this way.

I would like to suggest we use f instead of e as the preceding letter, to indicate these are flags.

I don't know if there's something else that can be done here though, so I thought I should ask. I will probably also add some "standard" way to tell this in the Standard Emums section of the manual.
#4
This is more to kick the ball on something...

Currently if you have a managed struct that extends another managed struct, and extension methods on the parent managed struct, the struct that extends it doesn't get the extensions from the first.

Should it get? Should it not get? What is the expected behavior here?
#5
General Discussion / itch io is down
Mon 09/12/2024 09:00:56
Some domain problem with the registrar caused itch io to be down. Since a few people here put their games there, just mentioning it here in case you try to load the website and it just keeps failing.

More details on hackernews .

Edit: I guess it is loading again, but haven't seen official communication on it yet.
#6
[Mod note: This thread was split off from I started a devlog]

Hey, you should definitely throw an update here as I didn't knew you were still writing them. Anyway, I only read the screenshot of the editor code in the last one, and I don't understand the while clause there, because there's no wait and you aren't animating each 1 take/give of energy, if you don't plan to do it this way, then you can just calculate the amount to take and take in one go instead of using while.

Ah, since you are using ags4, which we haven't formally made a proper manual yet, I think these are two texts that may be useful about the new compiler

https://github.com/adventuregamestudio/ags/wiki/New-compiler%27s-end-user-cheat-sheet

https://github.com/adventuregamestudio/ags/wiki/Features-of-the-new-Script-Compiler
#7


I had this idea of having custom properties available right in the property grid. The custom properties entry still has the same three dots editor, where new properties can be created and all the schema can be adjusted, but it would show the property right there in the property grid instead.

I made a minimal implementation of the idea in a branch in my ags repo.

I only added support for it in room objects. This is mostly to get an idea if this is a good idea or a bad idea. And also to adjust its design, perhaps it should work in some other way - the custom properties in a different page, or somehow they appear at top level, idnk.

Additional details: they are simply strings for now, so they are not aware of the type in the schema. I also made the experiment in ags3, but I guess this should actually be in ags4, where arrays are a thing, but I don't know how this would work with arrays.

Spoiler
references

codes I found searching on google and used as basis for the idea.


Btw, I will probably not invest time in this soon, I should probably get back to documenting 3.6.2 and moving it closer to release. But people usually take a loooong time to give feedback here in the forums anyway.
[close]
#8
[shadow=black,right]Open in browser button[/shadow]

motivation

The web builds from the engine produce an index.html file that has to request the necessary files for running the ags game, including the web build of the engine that is the ags.wasm file. All of these files have to be requested in a way that requires the files to be served from a server, including also safety requirements in modern web browsers. In this way, it's not possible to double-click the index.html file produced by the engine to load it in the browser.

idea

Come up with some way to serve the web files built files from the Editor. My idea is to add an entry in the build menu, right after Run without debugger entry that is Run in Web Browser. It may optionally also have an icon for this in the toolbar.

I imagine the menu entry and toolbar icon would only be enable if both: building for web is enabled in general settings and the last successful build included the web build.

problems

  • Need to come up with a good icon that fits the existing ones and conveys the idea of running in a web browser.
  • I don't know how to properly enable disable the button in the mentioned conditions - looking at AGS Editor code I don't see if such events already exist or not
  • Should it have an entry in the status bar showing the web server as active or not? And possibly a way to turn it off from there?
  • Clicking the button could load a browser pointing to localhost:8000 too, but closing it wouldn't stop the server unless we modify the index.html to throw some call to the server on close

limitations

These are not exactly problems, but constraints from implementing this in the editor. If put in an external tool like my AGS Toolbox, it could be easier to support these stuff.

  • The .NET only supports serving to localhost without requiring complex netsh calls, so this means one can only open a browser in the PC that has AGS Editor in this test - the python implementation could serve to 0.0.0.0 which serves public across the local network, so it's easy to test on a phone. It will never be possible to support this in the Editor afaict
  • Serving games that are not the project itself being built will not be supported

additional context

I have actually implemented this idea in a previous Game Engine Editor I made:

https://github.com/ericoporto/fgmk/blob/master/fgmk/game_server.py
The game server is linked above

The close of the tab in the browser stopping the server was implemented like this
https://github.com/ericoporto/fgmkJsEngine/blob/b40a1a173d2b4d3b8a0f25caeebe322e3b8703bc/src/bootstrap.js#L24

When the tab closed, it requested an invalid file called exit.json, and then the server would filter for this specifically and then stop it's thread when this was requested.

implementation

To make this easier to iterate on in C#, Winforms and .NET without going through building the entire AGS Editor I made a minimal prototype

MinimalWebServer.zip

This proposal was motivated by the thread in the forums here, I really would like to tackle but I need helping imagining the design of this, even if it's through drawings in paint and comments from other game developers.
#9
I have a custom module I use myself that looks like this

CustomFollow.ash
Spoiler
Code: ags
// new module header

import function Follow(this Character*, Character* toFollow, int dist=10, int eagerness=67);
import bool IsFollowing(this Character*);
import Character* Followed(this Character*);
[close]

CustomFollow.asc
Spoiler
Code: ags
// new module script
bool _isFollowing[];
Character* _following[];

void game_start(){
  _isFollowing = new bool[Game.CharacterCount];
  _following = new [/spoiler]Character[Game.CharacterCount];

}

function Follow(this Character*, Character* toFollow, int dist, int eagerness){
  _following[this.ID] = toFollow;
  if(toFollow!=null){
    _isFollowing[this.ID] = true;
  } else {
    _isFollowing[this.ID] = false;
  }
  this.FollowCharacter(toFollow, dist, eagerness);
}

bool IsFollowing(this Character*){
  return _isFollowing[this.ID];
}

Character* Followed(this Character*){
  return _following[this.ID];  
}
[close]

I've been thinking of just having a readonly property for the character named Following, as Character::get_Following that returns null if no character is being followed or a pointer to the character that this character is following. Does this makes sense? Would this be useful for anyone else?
#10
GitHub PR | Test Build for Download


Hey, this is a simple change, just wanted to see if people like it or not, if it's bad or is it good. I had the idea after this post here.

The idea is, if you edit the text of a label, there are three dots in the property grid that clicking it, it shows this very simple multiline text editor. If you click ok or hit ctrl+enter, it confirms and applies the text, or you can cancel to not apply the text change.

Double clicking a label also show it so you can edit the text of the label.

Very minimal feature, let me know what you people think.
#11
Hey, since the 3.6.2 version in beta there's some nice way to screenshot the screen without including GUIs or the mouse cursor. I started to sketch some module for custom screen transitions. The idea in general is to set the in-engine fade type to instant and then use the custom module to manage things.

It would then have a very simple API.

Code: ags
 enum TFXStyle {
  eTFX_FadeBlack,
  eTFX_FadeWhite,
  eTFX_ScrollLeft,
  eTFX_ScrollRight,
  eTFX_ScrollBottom,
  eTFX_ScrollTop
};

managed builtin struct TransitionFX {
  
  import static attribute TFXStyle Style;
  
  import static attribute bool Auto;
  
  import static void FadeOut();
  
  import static void FadeIn();
  
}

Still need to figure how to actually run the transition, because the Overlays get killed on room change, I think I will need to take a GUI to be able to have where to draw things, possibly with a few buttons to be able to make the drawing faster.

The main motivation for me is because I really like the first Zelda room transition that slide to the side you go to the screen. The other thing is I want to be able to set the time (haven't figured the API) for the transition to run to be able to give different feelings depending on the game scene.

Anyway, just wanted to talk a bit about screen transitions and see if people have other ideas about it.
#12
Particles version 0.1.0

Get Latest Release particles.scm | GitHub Repo | Project with Demo!


Particle Script Module for AGS

Overview

This module is meant to help you manage particles on screen, which can be used for visual effects or even for game related actions.

It has two base concepts, the emitter, which is the source and owner of the effect you want to devise, and the particles, which run a small piece of logic repeatedly and syncs itself to a visual representation as AGS Overlays.

There is an additional concept which this module uses called the particle definition, which is a simple object that has no logic, but it has a series of properties, which represents the initial configuration and instructions a particle will receive, including characteristics it should have, how it should behave (using physics concepts) and how it should look.

An emitter owns a collection of particle definitions (an array), and when it emits each particle it selects a particle definition from its collection at random, and assigns it to a particle, which is then emitted.

Because this collection of definitions can be big, you can use any random process you want (with your own probability distributions) to create this collection. Because the emitter samples this collection at random, the produced particles will have matching distribution (at least visually) to the one used to generate the array of definitions.


Usage

Here is a simple example, to quickstart using this module and give an idea of how it works

Code: ags
// ... in room script
// encapsulate definition in a function to be able to apply randomnes
ParticleDefinition* GetSparkleParticle()
{
  ParticleDefinition* sparkleParticle = new ParticleDefinition;
  sparkleParticle.LifeTotal = 50;
  sparkleParticle.VelX = Random(3000) - 1000;
  sparkleParticle.VelY = Random(3000) - 1000;
  sparkleParticle.TransparencyBegin = 0;
  sparkleParticle.TransparencyEnd = 100;
  sparkleParticle.WidthBegin = 3;
  sparkleParticle.WidthEnd = 8;
  sparkleParticle.HeightBegin = 3;
  sparkleParticle.HeightEnd = 8;
  sparkleParticle.Gravity = 100;
  sparkleParticle.GroundY = 154;
  sparkleParticle.Bounces = true;
  return sparkleParticle;
}

Emitter emt;

void room_AfterFadeIn()
{
  // Create array of particle definitions
  int defs_count = 2048;
  ParticleDefinition *defs[] = new ParticleDefinition[defs_count];
  for(i=0; i<defs_count; i++)
  {
    defs[i] = GetSparkleParticle();
  }
  
  // Emitter at (150, 90) emitting 10 particles, max 256 at a time
  emt.Init(150, 90, defs, defs_count, 10,  256);
}

void on_mouse_click(MouseButton button)
{
  // Emit particles on click
  emt.SetPosition(mouse.x, mouse.y);
  emt.Emit();
}

function repeatedly_execute_always()
{
  emt.Update();
}


Script API
Spoiler

Emitter

This struct is the main way we will manage particles in this module.

Emitter.Init
Code: ags
void Emitter.Init(int x, int y, ParticleDefinition * defs[], int defCount, int emitAmount, int maxParticles);
Initializes the emitter, has to be run once, before invoking any other method from the emitter.

You will pass the following parameters

- a position (x, y) to place the emitter (it can be set later to other using SetPosition method)
- an array of Particle Definitions, along with the size of this array
- the amount of particles that should be emitted when calling Emit()
- the maximum number of particles that should exist at the same time

Emitter.Update
Code: ags
void Emitter.Update();
This method will both run one step in the particle simulation and update their rendering on the screen using overlays.

You normally run this once in repeatedly_execute_always, room_RepExec or some other method you use to run once per frame.

Emitter.Emit
Code: ags
void Emitter.Emit();
Emits particles. The amount of particles emitted is the emitAmount set when you init the emitter.

A random particle definition is selected from the set definitions arrays, and used to initialize each particle emitted individually.

Emitter.SetPosition
Code: ags
void Emitter.SetPosition(int x, int y);
Sets the position of the emitter on screen.

Emitter.SetDefinitions
Code: ags
void Emitter.SetDefinitions(ParticleDefinition * defs[], int defCount);
Sets the definitions hold by the emitter.

Emitter.ParticlesHitPoint
Code: ags
Particle * [] Emitter.ParticlesHitPoint(int x, int y);
Get null terminated array of particles that overlaps with the given point.

Emitter.ParticlesHitRect
Code: ags
Particle * [] Emitter.ParticlesHitRect(int x, int y, int width, int height);
Get null terminated array of particles that overlaps with the given rectangle.


Particle

This struct represents a single particle in the particle system. It is used to simulate the movement, appearance, and behavior of each particle.

It's managed by the emitter and they can be retrieved through specific methods in the emitter (for now only hit tests), and then you can get some information from each directly.

Particle.Life
Code: ags
int attribute Particle.Life;
The remaining life of the particle. It decrements on each update and the particle dies when its life is equal to or below zero.

Particle.IsAlive
Code: ags
bool Particle.IsAlive();
Returns true if the particle is still alive (i.e., its life is greater than zero), and false otherwise.

Particle.HitsPoint
Code: ags
bool Particle.HitsPoint(int x, int y);
Returns true if the particle overlaps the given point (x, y). The particle is assumed to be a rectangle for the purpose of hit detection.

Particle.HitsRect
Code: ags
bool Particle.HitsRect(int x, int y, int width, int height);
Returns true if the particle overlaps the given rectangle (x, y, width, height). The particle is assumed to be a rectangle for the purpose of hit detection.


ParticleDefinition

This struct defines the behavior and visual properties of particles. It is used by the emitter to generate new particles with specific characteristics.

When you set the value of them, it's usually a good idea to create a function to encapsulate this setting, so you can produce many different values with random settings on each definition.

ParticleDefinition.Sprite
Code: ags
int ParticleDefinition.Sprite;

The sprite used for the particle. If SpriteBegin and SpriteEnd are set, this defines the initial frame of the particle animation.

ParticleDefinition.OffsetX
Code: ags
int ParticleDefinition.OffsetX;
The horizontal offset from the emitter's position when the particle is emitted.

ParticleDefinition.OffsetY
Code: ags
int ParticleDefinition.OffsetY;
The vertical offset from the emitter's position when the particle is emitted.

ParticleDefinition.LifeTotal
Code: ags
int ParticleDefinition.LifeTotal;
The total lifetime of the particle, in update loops. This value is used to initialize the particle's life when it is emitted.

ParticleDefinition.VelX
Code: ags
int ParticleDefinition.VelX;
The initial horizontal velocity of the particle, in thousandths of a pixel per update loop. It's in X direction, so positive numbers moves particle to right.

ParticleDefinition.VelY
Code: ags
int ParticleDefinition.VelY;
The initial vertical velocity of the particle, in thousandths of a pixel per update loop. It's in Y direction, so positive numbers moves particle upwards.

ParticleDefinition.Gravity
Code: ags
int ParticleDefinition.Gravity;
The vertical acceleration applied to the particle over time (gravity), in thousandths of a pixel per update loop.

ParticleDefinition.SpriteBegin
Code: ags
int ParticleDefinition.SpriteBegin;
The initial sprite frame of a sequential sprite range.

ParticleDefinition.SpriteEnd
Code: ags
int ParticleDefinition.SpriteEnd;
The final sprite frame of a sequential sprite range.

ParticleDefinition.TransparencyBegin
Code: ags
int ParticleDefinition.TransparencyBegin;
The transparency level when the particle is emitted. A value of 0 is fully opaque, and 100 is fully transparent.

ParticleDefinition.TransparencyEnd
Code: ags
int ParticleDefinition.TransparencyEnd;
The transparency level when the particle reaches the end of its life.

ParticleDefinition.WidthBegin
Code: ags
int ParticleDefinition.WidthBegin;
The width of the particle when it is emitted.

ParticleDefinition.WidthEnd
Code: ags
int ParticleDefinition.WidthEnd;
The width of the particle when it reaches the end of its life.

ParticleDefinition.HeightBegin
Code: ags
int ParticleDefinition.HeightBegin;
The height of the particle when it is emitted.

ParticleDefinition.HeightEnd
Code: ags
int ParticleDefinition.HeightEnd;
The height of the particle when it reaches the end of its life.

ParticleDefinition.Bounces
Code: ags
bool ParticleDefinition.Bounces;
Determines whether the particle should bounce when it hits the ground.

ParticleDefinition.GroundY
Code: ags
int ParticleDefinition.GroundY;
The vertical position that the particle will treat as the ground for bounce detection. If this is not set, the particle will not recognize any ground.

ParticleDefinition.BlendMode
Code: ags
BlendMode ParticleDefinition.BlendMode;
The blend mode to use when rendering the particle.

Compatibility: This is only available in AGS 4.0 and above.

ParticleDefinition.Angle
Code: ags
float ParticleDefinition.Angle;
The initial rotation angle of the particle, in degrees (0 to 360).

Compatibility: This is only available in AGS 4.0 and above.

ParticleDefinition.RotationSpeed
Code: ags
float ParticleDefinition.RotationSpeed;
The speed at which the particle rotates, in degrees per update loop.

Compatibility: This is only available in AGS 4.0 and above.

[close]


License
This module is created by eri0o is provided with MIT License, see LICENSE for more details.

Note

This module is considered in beta stage, and there is probably a lot missing in it, as an example it can't yet produce room overlays (I haven't figured how I should manage them in the pool that is used behind the scenes).

Please play with it and give me feedback and ideas you have. Still, there is a lot that can be done with it already!
#13
I decided to play around with the idea of a particle system just for fun, first, here is the demo


Here is the sketch of the module header and script

particle.ash
Spoiler
Code: ags
// new module header

managed struct ParticleDefinition {
    int offsetX; // Offset from the emitter position
    int offsetY; // Offset from the emitter position
    int life;    // Lifetime of the particle
    int vx;      // mili Velocity in x direction
    int vy;      // mili Velocity in y direction
    int gravity; // mili Gravity effect on the particle
    int initialTransparency; // Initial transparency
    int finalTransparency; // Final transparency
    int initialWidth; // Initial width
    int finalWidth; // Final width
    int initialHeight; // Initial height
    int finalHeight; // Final height
    bool groundHitBounces;
    int groundY;
    int groundX;
    int groundWidth;
};

managed struct Particle {
    float x;
    float y;
    int life;
    int initialLife;
    int overlayIndex; // This refers to the overlay in the overlay pool
    float vx; // x velocity
    float vy; // y velocity
    float gravity; // this is vertical acceleration downwards
    int transparency;
    int width;
    int height;
    int initialTransparency; 
    int finalTransparency; 
    int initialWidth; 
    int finalWidth; 
    int initialHeight; 
    int finalHeight;
    bool bounces;
    int groundY;
    int groundX;
    int groundWidth;

    // Initialize the particle with its position, life, velocity, and transparency
    import void Init(ParticleDefinition* def, int x, int y, int overlayIndex);
    import void Update(); // Update particle position and overlay
    import bool IsAlive(); // Check if particle is still alive
};

struct Emitter {
  protected int x;
  protected int y;
  protected int particleLife;
  protected int emitParticleCount;
  protected int particleCount;
  protected int sprite; // The sprite slot to use for particles
  protected int gravity;
  protected Particle* particles[]; // Pool of particles
  protected ParticleDefinition* definitions[]; // Array of particle definitions
  protected int definitionsCount; // Count of particle definitions
  
  /// Set sprite
  import void SetSprite(int graphic);  
  /// Set emitter possible particle definitions
  import void SetParticleDefinitions(ParticleDefinition* definitions[], int definitionsCount);
  /// Update emitter position
  import void SetPosition(int x, int y);

  /// Initialize the emitter
  import void Init(int x, int y, ParticleDefinition* definitions[], int definitionsCount, int emitParticleCount = 10, int particleCount = 50, int sprite = 0, int gravity = 0);
  /// Emit a single particle
  import void EmitSingleParticle();  
  /// Emit particles
  import void Emit(); 
  /// Update all particles
  import void Update();
};

/// Global Particle Emitter
import Emitter GPE;
[close]

particle.asc
Spoiler
Code: ags
// new module script

#define MAX_OVERLAYS 512
Overlay* overlayPool[MAX_OVERLAYS];
bool overlayUsed[MAX_OVERLAYS];
int lastUsed;
Emitter GPE;
export GPE;

#define MAX_LERP 1024

// lerp from percent 0 to 1024
int _Lerp(int start, int end, int percent) {
  if (percent < 0) percent = 0;
  if (percent > MAX_LERP) percent = MAX_LERP;

  // Calculate the interpolated value
  return start + ((end - start) * percent) / MAX_LERP;
}

int InvalidateOverlay(int index)
{
  if(overlayPool[index] != null)
    overlayPool[index].Remove();
  overlayPool[index] = null; // Clear the reference to the overlay
  overlayUsed[index] = false; // Mark the overlay slot as free
  return -1;
}

// Find an available overlay slot in the pool
function GetAvailableOverlayIndex() {
  for (int i = lastUsed; i < MAX_OVERLAYS; i++) {
    if (!overlayUsed[i]) {
      InvalidateOverlay(i);
      overlayUsed[i] = true;
      lastUsed = i;
      return i;
    }
  }
  for (int i = 0; (i < lastUsed) && (i < MAX_OVERLAYS); i++) {
    if (!overlayUsed[i]) {
      InvalidateOverlay(i);
      overlayUsed[i] = true;
      lastUsed = i;
      return i;
    }
  }
  return -1; // No available overlay
}

void UpdateOverlayFromParticle(Overlay* ovr, Particle* p)
{
  ovr.X = FloatToInt(p.x);
  ovr.Y = FloatToInt(p.y);
  ovr.Transparency = p.transparency;
  ovr.Width = p.width;
  ovr.Height = p.height;
}

void Particle::Init(ParticleDefinition* def, int x, int y,  int overlayIndex) {
  if(this.overlayIndex >= 0 && this.overlayIndex < MAX_OVERLAYS) {
    InvalidateOverlay(this.overlayIndex);
  }

  this.x = IntToFloat(x + def.offsetX); // Offset based on emitter
  this.y = IntToFloat(y + def.offsetY); // Offset based on emitter
  this.life = def.life;
  this.vx = IntToFloat(def.vx)/1000.0;
  this.vy = IntToFloat(def.vy)/1000.0;
  this.gravity = IntToFloat(def.gravity)/1000.0;
  this.transparency = def.initialTransparency;
  this.initialTransparency = def.initialTransparency;
  this.finalTransparency = def.finalTransparency;
  this.width = def.initialWidth;
  this.initialWidth = def.initialWidth;
  this.finalWidth = def.finalWidth;
  this.height = def.initialHeight;
  this.initialHeight = def.initialHeight;
  this.finalHeight = def.finalHeight;
  this.overlayIndex = overlayIndex;
  this.initialLife = def.life; // Store initial life for transitions
  this.bounces = def.groundHitBounces;
  this.groundY = def.groundY;
  this.groundX = def.groundX;
  this.groundWidth = def.groundWidth;
  if(this.groundY > 0) {
    if(this.groundWidth <= 0 ) {
      this.groundWidth = 8192;
      this.groundX = -1024;
    }
  } else {
    this.groundY = 0;
    this.groundX = 0;
    this.groundWidth = 0;
  }

  if (overlayIndex >= 0 && overlayPool[overlayIndex] != null) {
    UpdateOverlayFromParticle(overlayPool[overlayIndex], this);
  }
}

bool Particle::IsAlive() {
  return (this.life > 0);
}

// Update the particle state and sync with overlay
void Particle::Update() {
  if (this.IsAlive()) {
    this.x += this.vx;
    this.y += this.vy;
    this.vy += this.gravity; // Apply gravity
    this.life--;
    int px = FloatToInt(this.x);
    int py = FloatToInt(this.y);

    // Calculate the scaling and transparency transitions based on life
    int lifeRatio =  MAX_LERP - ((this.life * MAX_LERP) / this.initialLife); // 0 to 1024
    this.transparency = _Lerp(this.initialTransparency, this.finalTransparency, lifeRatio);
    this.width = _Lerp(this.initialWidth, this.finalWidth, lifeRatio);
    this.height = _Lerp(this.initialHeight, this.finalHeight, lifeRatio);

    if (this.overlayIndex >= 0 && overlayPool[this.overlayIndex] != null) {
      UpdateOverlayFromParticle(overlayPool[this.overlayIndex], this);
    }    
    
    if ((py >= this.groundY) && (px >= this.groundX) && (px <= (this.groundX + this.groundWidth))) {
      if (this.bounces) {
        this.vy = -this.vy * 0.7; // Invert velocity, reduce it to simulate energy loss
      } else {
        this.life = 0; // Mark particle as dead
      }
    }
  } else {
    // Remove overlay if life is over
    if (this.overlayIndex >= 0) {
      this.overlayIndex = InvalidateOverlay(this.overlayIndex); // Invalidate the overlay index
    }
  }
}

void Emitter::SetPosition(int x, int y)
{
  this.x = x;
  this.y = y;
}

void Emitter::SetSprite(int graphic)
{
  this.sprite = graphic;
}

void Emitter::SetParticleDefinitions(ParticleDefinition* definitions[], int definitionsCount)
{
  this.definitions = definitions;
  this.definitionsCount = definitionsCount;
}

// Initialize the emitter with position, particle definitions, and specific parameters
void Emitter::Init(int x, int y, ParticleDefinition* definitions[], int definitionsCount, int emitParticleCount, int particleCount, int sprite, int gravity) {
  this.SetPosition(x, y);
  this.particleCount = particleCount;
  this.SetSprite(sprite);
  this.gravity = gravity;
  this.SetParticleDefinitions(definitions, definitionsCount);
  this.emitParticleCount = emitParticleCount;
  this.particles = new Particle[particleCount];
  for (int i = 0; i < particleCount; i++) {
    this.particles[i] = new Particle;
  }
}

// Emit a single particle from the emitter
void Emitter::EmitSingleParticle() {
  for (int i = 0; i < this.particleCount; i++) {
    if (this.particles[i].IsAlive())
    {
      continue;
    }
    
    // Reuse dead particle if it's not alive anymore
    int overlayIndex = GetAvailableOverlayIndex();
    if (overlayIndex >= 0) {
      Overlay* ovr = Overlay.CreateGraphical(this.x, this.y, this.sprite);
      overlayPool[overlayIndex] = ovr;

      // Randomly select a particle definition from the available definitions
      int defIndex = 0;
      if(this.definitionsCount > 0) {
        defIndex = Random(this.definitionsCount-1);
      }
      ParticleDefinition* def = this.definitions[defIndex];

      this.particles[i].Init(def, this.x, this.y, overlayIndex);
    }
    return;
  }
}

// Emit particles from the emitter
void Emitter::Emit() {
  for (int i = 0; i < this.emitParticleCount; i++) {
    this.EmitSingleParticle();
  }
}

// Update all particles
void Emitter::Update() {
  for (int i = 0; i < this.particleCount; i++) {
    if (this.particles[i].IsAlive()) {
      this.particles[i].Update();
    } else if (this.particles[i].overlayIndex >= 0) {
      // Ensure overlays are freed for dead particles
      this.particles[i].overlayIndex = InvalidateOverlay(this.particles[i].overlayIndex); // Invalidate the overlay index
    }
  }
}

void game_start()
{
  ParticleDefinition* d[];
  GPE.Init(Screen.Width/2, Screen.Height/2, d, 0, MAX_OVERLAYS/14, MAX_OVERLAYS/2, 0, 0);
}

void repeatedly_execute_always()
{
  GPE.Update();
}
[close]

And here is the room script for the demo above
room1.asc
Spoiler
Code: ags
// room script file

//Emitter emt;

function hGlowingOrb_Look(Hotspot *thisHotspot, CursorMode mode)
{
  player.Say("It is the second best glowing orb that I've seen today.");
}

ParticleDefinition* GetFireworksParticle()
{
  ParticleDefinition* fireworksParticle = new ParticleDefinition;
  fireworksParticle.life = 40;
  fireworksParticle.vx = Random(4000) - 2000; // Random outward velocity
  fireworksParticle.vy = Random(4000) - 2000;
  fireworksParticle.gravity = 0; // No gravity
  fireworksParticle.initialTransparency = 0;
  fireworksParticle.finalTransparency = 100;
  fireworksParticle.initialWidth = 2;
  fireworksParticle.finalWidth = 20; // Expanding outward
  fireworksParticle.initialHeight = 2;
  fireworksParticle.finalHeight = 20;
  return fireworksParticle;
}

ParticleDefinition* GetSparkleParticle()
{
  ParticleDefinition* sparkleParticle = new ParticleDefinition;
  sparkleParticle.life = 50;
  sparkleParticle.vx = Random(3000) - 1000;
  sparkleParticle.vy = Random(3000) - 1000;
  sparkleParticle.initialTransparency = 0;
  sparkleParticle.finalTransparency = 100;
  sparkleParticle.initialWidth = 3;
  sparkleParticle.finalWidth = 8;
  sparkleParticle.initialHeight = 3;
  sparkleParticle.finalHeight = 8;
  sparkleParticle.gravity = 100;
  sparkleParticle.groundY = 154;
  sparkleParticle.groundHitBounces = true;
  return sparkleParticle;
}

ParticleDefinition* GetExplosionParticle()
{
  ParticleDefinition* explosionParticle = new ParticleDefinition;
  explosionParticle.life = 30;
  explosionParticle.vx = Random(6000) - 3000;
  explosionParticle.vy = Random(6000) - 3000;
  explosionParticle.gravity =  -1000;
  explosionParticle.initialTransparency = 15;
  explosionParticle.finalTransparency = 100;
  explosionParticle.initialWidth = 15;
  explosionParticle.finalWidth = 30;
  explosionParticle.initialHeight = 15;
  explosionParticle.finalHeight = 30;
  return explosionParticle;
}

ParticleDefinition* GetSmokeParticle()
{
  ParticleDefinition* smokeParticle = new ParticleDefinition;
  smokeParticle.life = 40+Random(14);
  smokeParticle.vy = -1000-Random(1000);
  smokeParticle.initialTransparency = 0;
  smokeParticle.finalTransparency = 100;
  smokeParticle.initialWidth = 10+Random(2);
  smokeParticle.finalWidth = 20+Random(2);
  smokeParticle.initialHeight = 20+Random(2);
  smokeParticle.finalHeight = 10+Random(2);
  return smokeParticle;
}

ParticleDefinition* GetBubbleParticle()
{
  ParticleDefinition* bubbleParticle = new ParticleDefinition;
  bubbleParticle.life = 60;
  bubbleParticle.vx = Random(500) - 250; // Small horizontal drift
  bubbleParticle.vy = -1000 - Random(500); // Rising upwards
  bubbleParticle.gravity = -200; // Rising effect
  bubbleParticle.initialTransparency = 30;
  bubbleParticle.finalTransparency = 100;
  bubbleParticle.initialWidth = 5;
  bubbleParticle.finalWidth = 15; // Expands as it rises
  bubbleParticle.initialHeight = 5;
  bubbleParticle.finalHeight = 15;
  return bubbleParticle;
}

ParticleDefinition* GetRainParticle()
{
  ParticleDefinition* rainParticle = new ParticleDefinition;
  rainParticle.offsetX = Random(Screen.Width) - (Screen.Width/2);
  rainParticle.offsetY = -Random(30);
  rainParticle.life = 50;
  rainParticle.vx = Random(500) - 250; // Slight horizontal movement
  rainParticle.vy = 3000; // Falling down quickly
  rainParticle.gravity = 200; // Light gravity effect
  rainParticle.initialTransparency = 30;
  rainParticle.finalTransparency = 80;
  rainParticle.initialWidth = 2;
  rainParticle.finalWidth = 2;
  rainParticle.initialHeight = 10;
  rainParticle.finalHeight = 15; // Lengthening as it falls
  return rainParticle;
}

ParticleDefinition* GetFireParticle()
{
  ParticleDefinition* fireParticle = new ParticleDefinition;
  fireParticle.life = 35;
  fireParticle.vx = Random(1000) - 500; // Small horizontal variance
  fireParticle.vy = -1500 - Random(500); // Rising upward
  fireParticle.gravity = -50; // Slow upward pull
  fireParticle.initialTransparency = 50;
  fireParticle.finalTransparency = 100; // Disappears as it rises
  fireParticle.initialWidth = 10;
  fireParticle.finalWidth = 20; // Expands as it rises
  fireParticle.initialHeight = 10;
  fireParticle.finalHeight = 15;
  return fireParticle;
}

ParticleDefinition* GetSnowParticle()
{
  ParticleDefinition* snowParticle = new ParticleDefinition;
  snowParticle.offsetX = Random(Screen.Width) - (Screen.Width/2);
  snowParticle.offsetY = -Random(30);
  snowParticle.life = 150;
  snowParticle.vx = Random(300) - 150; // Slight horizontal drift
  snowParticle.vy = Random(300) + 300; // Slow downward movement
  snowParticle.gravity = 15; // Minimal gravity effect
  snowParticle.initialTransparency = 50;
  snowParticle.finalTransparency = 80;
  snowParticle.initialWidth = 4;
  snowParticle.finalWidth = 6; // Slight expansion as it falls
  snowParticle.initialHeight = 4;
  snowParticle.finalHeight = 6;
  return snowParticle;
}

enum PresetParticleType {
  ePPT_Fireworks, 
  ePPT_Sparkle, 
  ePPT_Explosion, 
  ePPT_Smoke, 
  ePPT_Bubble, 
  ePPT_Rain, 
  ePPT_Fire, 
  ePPT_Snow
};

#define ePPT_Last ePPT_Snow

ParticleDefinition* [] GetParticleDefinitionsArrayByType(PresetParticleType type, int count)
{
  ParticleDefinition* definitions[] = new ParticleDefinition[count];
  int i;
  switch(type) {
    case ePPT_Fireworks:
      for(i=0; i<count; i++)
      {
        definitions[i] = GetFireworksParticle();
      }
    break;
    case ePPT_Sparkle:
      for(i=0; i<count; i++)
      {
        definitions[i] = GetSparkleParticle();
      }
    break;
    case ePPT_Explosion:
      for(i=0; i<count; i++)
      {
        definitions[i] = GetExplosionParticle();
      }
    break;
    case ePPT_Smoke:
      for(i=0; i<count; i++)
      {
        definitions[i] = GetSmokeParticle();
      }
    break;
    case ePPT_Bubble:
      for(i=0; i<count; i++)
      {
        definitions[i] = GetBubbleParticle();
      }
    break;
    case ePPT_Rain:
      for(i=0; i<count; i++)
      {
        definitions[i] = GetRainParticle();
      }
    break;
    case ePPT_Fire:
      for(i=0; i<count; i++)
      {
        definitions[i] = GetFireParticle();
      }
    break;
    case ePPT_Snow:
      for(i=0; i<count; i++)
      {
        definitions[i] = GetSnowParticle();
      }
    break;
  }  
  return definitions;
}

String GetTypeName(PresetParticleType type) {  
  switch(type) {
    case ePPT_Fireworks:
      return "Fireworks";
    case ePPT_Sparkle:
      return "Sparkle";
    case ePPT_Explosion:
      return "Explosion";
    case ePPT_Smoke:
      return "Smoke";
    case ePPT_Bubble:
      return "Bubble";
    case ePPT_Rain:
      return "Rain";
    case ePPT_Fire:
      return "Fire";
    case ePPT_Snow:
      return "Snow";
    default:
      return "Unknown";
  }  
}

void SetEmitterToType(PresetParticleType type)
{
  int definitions_count = 2048;
  ParticleDefinition* definitions[] = GetParticleDefinitionsArrayByType(type, definitions_count);
  GPE.SetParticleDefinitions(definitions, definitions_count);
  lbl_particle_selected.Text = GetTypeName(type);
}

int particle_type;
void on_call (int value)
{
  if(value == 1) {
    particle_type++;
    if(particle_type> ePPT_Last) {
      particle_type = 1;
    }
  }
  SetEmitterToType(particle_type);
}

function room_Load()
{  
  SetEmitterToType(ePPT_Fireworks);
}

void on_mouse_click(MouseButton button)
{
  int mx = mouse.x;
  int my = mouse.y;
  GPE.SetPosition(mx, my);
  GPE.Emit();
}
[close]

OK, so I started to play with this thing by sheer poking around, and there is a lot that is unfinished, but I kinda was trying to think on what does Particle management system are expected to have. I used some lerp there that has both initial and final state so one can see this could easily put on top the curves used by the tween module, but what else could be done here?

I want to keep at minimal Overlay manipulation. Other thing is I kind have no idea in a way that would be nice to actually setup things, I did a weird way that you have a particle definition, then you make an array of those and pass to the emitter, and then the emitter select at random from the definitions, the idea here is to avoid to have complex random functions per attribute, but I probably still need to have some modifier aspect to each attribute.

Anyway, just wanted to kick around the idea of a particle module and see ideas on this.

Edit: I had an idea that the emitter could have types like point or rectangle (lacking of other ideas here) and if it's a rectangle it would spawn a particle randomly in a point inside the rectangle. My idea is that perhaps doing that I could make things like rain and other ideas. Edit2: I actually can hack around this using the offsetX and offsetY in the particle itself!

Other idea is besides having the Emit functionality, to also have a RepeatedlyEmit that if set would emit a set number of times in the Emitter Update call.
#14
So, it's been a while now that my ASUS ZenBook (2018) has died on me - well, it's battery and keyboard died and I can use it as a local desktop. It's screen also isn't in good shape... I also had a different ASUS notebook (2019, with Nvidia) that died (battery and storage), and a Dell Latitude (from 2022) (touchpad and then everything...). I had an old LG before that I had the storage die, but I replaced and then battery and one day I accidentally broke the power connector...

I have a MacBook that has been going strong, and while I am happy with it, I have been thinking about getting something smaller and more portable - and apparently Apple discontinued the 11 inch MacBooks. The problem is what, since apparently smaller notebooks are not a thing anymore. I wanted something that could run Windows so I could run Visual Studio and run and test C++ and C# code for Windows. Because I don't have anything currently I can only code when I am both at home and also haven't got absolutely anything else going on here...

With all that said, I've started to look into some chinese notebooks that apparently kept the netbook dream alive. So I looked at the Onemix 4s (and some others from the same maker), the OneGx1, the Chuwi Microbook and the GPD Pocket 3.

Now from all of these, it looks like the Onemix and others from the same manufacturer there are quite a few manufacturing issues reported online, but the people who got well functioning units apparently really like it, but also it has a usbC charging port that isn't actually usbc, it just reuses the connector so if you accidentally plug a different charger there it does... The OneGx1 I couldn't get any information online and it's very expensive here - it's like twice the price of an average MacBook.

The Chuwi Microbook looks super interesting, the size appears to be good, it's not expensive (only 370 USD) but apparently there isn't many people that bought it yet so I can't find much information online.

Now the GPD Pocket 3 is looking very appealing currently, it has an Intel Gold 7505 version that was released this year before the new GPD Pocket 4 release. There is more information here... Anyway I am thinking about if I should get it or not. It's around 700 USD

There is also a version of the GPD Pocket 3 with i7 1195G7, which is a much better processor, but then the device goes to 1000 USD price, which is a much bigger price and I find it harder to justify it - gets dangerously into get a MacBook and try to run Windows on QEMU territory...

For comparison from a reputable brand, the closest I found in size is the ASUS 2024 Vivobook Go 11.6", which is much cheaper, at 240 USD, but the problem is it's configuration is terrible, at 4 GB RAM, while the GPD Pocket 3 has 16 GB RAM.

Anyway, does anyone of you here have any of these small laptops? Or is there some other model I am forgetting?

I really can't go with iPad or an Android tablet because they can't run Visual Studio which is a big deal breaker for me - I can't actually make anything without it... I can need for agsing...

Anyway, curious if someone has opinions on this - like, perhaps I should just get the regular ThinkPads... I don't know if they still make them small.
#15
OK, I am almost adding this as a feature in the plugin API, but before doing so I am curious if perhaps there is already a way to read it somehow.

I need to figure the encoding of a string I am receiving from the engine in a plugin.

Is there some way to do it in the 3.6.1 version of the engine? Thanks!
#16
This is just a minor suggestion to keep mojoAL updates easier on the main repository. We could have a fork of mojoAL from icculus in the organization and then just rebase our changes on top of icculus main branch. In this way it would be easier to update and also to sync and track changes.

I suggest here because I don't have permission on the org to create repositories so perhaps one of the devs could do this.
#17
https://icq.com/desktop/en#windows

Just wanted to throw a thread on this. I distinctly remember ICQ being phased out by people and the transition to the MSN era.
#18
First, String Split and Join are possible to implement in AGS Script - below I give String Split implementation but Join is easy to imagine.

Spoiler
Code: ags
int CountToken(this String*, String token)
{
  int count = 0, cur = 0, next = 0;
  String sub = this;

  while(sub.Length > 0)
  {
    if(sub.IndexOf(token)==-1) return count;
    sub = sub.Substring(sub.IndexOf(token)+token.Length, sub.Length);
    count++;
  }
  return count;
}

String[] Split(this String*, String token)
{
  int i = 0, cur = 0, count;
  count = this.CountToken(token);
  if(count<=0)
  {
    String r[] = new String[1];
    r[0] = null;
    return r;
  }

  String r[] = new String[count+2];
  String sub = this;

  while(i < count)
  {
    cur = sub.IndexOf(token);
    if(cur==-1) cur=sub.Length;
    r[i] = sub.Substring(0, cur);
    sub = sub.Substring(sub.IndexOf(token)+token.Length, sub.Length);
    i++;
  }

  r[i] = sub.Substring(0, sub.Length);
  i++;
  r[i] = null;
  return  r;
}
[close]

With that out of the way, I have been imagining having String Split and Join directly in the AGS Engine Script API - in AGS4. In C# .NET, both String.Split and String.Join are there.

But there's a catch. We don't have Length in Dynamically allocated arrays. So how does an API for this would work?

So in my AGS Script implementation of Split the way it works is the last element is a null element. Unfortunately AGS Script already have dictionaries and sets that already return arrays of strings, but they also have the count in themselves, meaning their API do not add the last element as null, so this would not be consistent.

So mostly trying to figure it out if String Split and Join would make sense in the Script String API or it's best to have it as a module, and how to design it.
#19
I want to do a Say(int sprite) method, like extend the character and just do a function that works like say but instead of taking a string it takes a sprite slot.

If it's Lucasarts speech style the sprite is shown alone, if it's Sierra style it's shown inside the textbox.

If the user skips like regular Say are skipped with a mouse click or button it does that. It also is smart and disables for millisseconds and doesn't take skip during this time - exactly like Say does.

What is the minimum amount of code one could do to implement such a thing in script?
#20
Modules, Plugins & Tools / MODULE: Fancy 0.7.5
Mon 15/04/2024 19:53:49
Fancy version 0.7.5

Get Latest Release fancy.scm | GitHub Repo | Project with Demo!


Fancy is a Script module for "fancy" text in Adventure Game Studio, you can have text with multiple colors, fonts, with sprites and other. It brings it's own Typed-Text mechanism and additional fancyness.

The cheatsheet of tags are below. Some tags are "solo", they don't require a closing tag.

  • Color tag is "[c:123]" and "[/c]", where "123" is an ags color for the text.
  • Outline color tag is "[o:123]" and "[/o]", where "123" is an ags color for the outline.
  • Font tag is "[f:123]" and "[/f]", where "123" is an ags font index.
  • Sprite tag is solo "[s:123]", where "123" is an ags sprite.

Note: use "\n" for linefeed, old lone "[" ags linefeed is not supported.

Notice that if you need to pass a number that is dynamic you can use String.Format to create the string with the proper number, like if the sprite icon you want to put in your text is from a dynamic sprite or the color of a word comes from a character speech color.


Usage

I will improve this soon, for now some small examples

Using a regular drawing surface:

Code: ags
function room_AfterFadeIn()
{
  Fancy.AddAlias("red", 64493); // this should be at game_start

  DrawingSurface* surf = Room.GetDrawingSurfaceForBackground();

  surf.DrawingColor = 10565;
  surf.DrawRectangle(48, 48, 248, 108);
  surf.DrawFancyString(48, 48, "Hello!\n[o:8560]Can you find me the [c:27647]blue cup [s:2041][/c][/o]?\nI lost it in the [c:red]dangerous [f:0]planet[/f][/c], somewhere.", FancyConfig.Create(eFontSpeech, 22422), 200);
}

Simple not-useful typed text example:

Code: ags
FancyTypedText fttb; // has to be global

function room_AfterFadeIn()
{
  Fancy.AddAlias("red", 64493); // this should be at game_start
  Fancy.AddAlias("ico_bcup", 2041); // this should be at game_start

  fttb.FancyConfig.Font = eFontSpeech;
  fttb.FancyConfig.TextColor = 22422;
  fttb.SetDrawingArea(48, 40, 200);
  fttb.Start("Hello!\n[o:8560]Can you find me the [c:27647]blue cup [s:ico_bcup][/c][/o]?\nI lost it in the [c:red]dangerous [f:0]planet[/f][/c], somewhere.");
}

void repeatedly_execute_always()
{
  if(fttb.IsTextBeingTyped)
  {
    DrawingSurface* surf = Room.GetDrawingSurfaceForBackground();
    
    surf.DrawingColor = 10565;
    surf.DrawRectangle(48, 40, 248, 90);
    
    fttb.DrawTyped(surf);
  }
}


Script API
Spoiler
Script Extensions

DrawingSurface.DrawFancyString
Code: ags
void DrawingSurface.DrawFancyString(int x, int y, const string text, optional FancyConfig* config, optional int width);
Draw the text from a fancy string on the drawing surface.


DynamicSprite.CreateFromFancyString
Code: ags
DynamicSprite* DynamicSprite.CreateFromFancyString(const string text, optional FancyConfig* config, optional width);
Create a sprite with the text of a fancy string

DynamicSprite.CreateFromFancyTextBox
Code: ags
DynamicSprite* DynamicSprite.CreateFromFancyTextBox(const string text, optional FancyConfig* config, optional width, optional Fancy9Piece* f9p);
Create a sprite of a textbox with a fancy string using a 9-piece.


Character.FancySay
Code: ags
void Character.FancySay( const string text, optional FancyConfig* config, optional int width, optional Fancy9Piece* f9p );
A Say alternative that support fancy strings

Character.FancySayTyped
Code: ags
void Character.FancySayTyped( const string text, optional FancyConfig* config, optional int width, optional Fancy9Piece* f9p );
A Say alternative that support fancy strings, it types it instead of readily drawing


Button.Fancify
Code: ags
void Button.Fancify(optional Fancy9Piece* normal, optional Fancy9Piece* mouse_over, optional Fancy9Piece* pushed);
Sets a button NormalGraphic and additional sprites from it's text, assumed as fancy string, and 9-piece.

Button.UnFancify
Code: ags
void Button.UnFancify();
Removes fancyness from button (clear any altered sprites)


Fancy

This is a global struct you can't instantiate, it contains static methods for global configuration meant to be used at game start.

Fancy.AddAlias
Code: ags
static void Fancy.AddAlias(String key, int value);

Allows adding a global alias to a tag-value. Ex: AddAlias("red", 63488) allows using [c:red] instead of [c:63488].

This may be useful if you want to be able to change your mind later on what is the specific of a color, or you want to have an easier type remembering sprite icons you are reusing in your texts.

Alias added here are global to all of Fancy. It's recommended that you only add an alias once to everything you need at the game_start of your project, make it easier to manage aliases.

Fancy.FancyConfig
Code: ags
static attribute FancyConfig* Fancy.FancyConfig;

This is the default global FancyConfig, if you don't specify or if you pass null to a method that requires a FancyConfig as parameter it will use this config instead.


Fancy9Piece

This is a managed struct that holds a 9-piece that can be used for drawing text boxes.

Fancy9Piece.CreateFromTextWindowGui
Code: ags
static Fancy9Piece* Fancy9Piece.CreateFromTextWindowGui(GUI* text_window_gui);
Create a 9 piece fancy compatible from a Text Window GUI.

Fancy9Piece.CreateFrom9Sprites
Code: ags
static Fancy9Piece* Fancy9Piece.CreateFrom9Sprites(int top , int bottom, int left, int right, int top_left, int top_right, int bottom_left, int bottom_right, int center_piece = 0, int bg_color = 0);
Create a 9 piece fancy from 9 sprite slots.

You can optionally pass a color instead of a sprite for the center piece, by passing 0 to center_piece and a valid ags color in bg_color.


FancyConfig

This is a managed struct meant to configure an instance from FancyTextBase and extensions, prefer using it's Create method.

FancyConfig.Create
Code: ags
static FancyConfig* FancyConfig.Create(FontType font, int color, int outline_color, int outline_width, Alignment align, int line_spacing);
Configuration structure for fancy text drawing, allowing customization of font, text color, line spacing, and alignment.
By default, when using create, if you don't set, outline color is initially set for COLOR_TRANSPARENT and outline width is initially set to 1, align is set to eAlignBottomLeft and line_spacing is 0.


FancyTextBase

FancyTextBase.SetDrawingArea
Code: ags
void FancyTextBase.SetDrawingArea(int x, int y, int width = FANCY_INFINITE_WIDTH);
Sets the area for drawing fancy text, specifying the position and width.

FancyTextBase.Text
Code: ags
attribute String FancyTextBase.Text;
Sets the text content for the fancy text, this is where the parsing of the text happens.

FancyTextBase.PlainText
Code: ags
attribute readonly String FancyTextBase.PlainText;
Get the set text without tags.

FancyTextBase.Draw
Code: ags
void FancyTextBase.Draw(DrawingSurface* surf);
Draws the fancy text on the specified drawing surface.

FancyTextBase.FancyConfig
Code: ags
attribute FancyConfig* FancyTextBase.FancyConfig;
Property to set the Fancy Text rendering configuration.


FancyTextBox

FancyTextBox.CreateTextBoxSprite
Code: ags
DynamicSprite* FancyTextBox.CreateTextBoxSprite();
Create a sprite of a textbox with a fancy string using the configured 9-piece

FancyTextBox.Fancy9Piece
Code: ags
atrribute Fancy9Piece* FancyTextBox.Fancy9Piece;
Setup the 9-piece for the Text Box creation.


FancyTypedText

FancyTypedText.Clear
Code: ags
void FancyTypedText.Clear();
Clears all text and resets everything for typed text.

FancyTypedText.Start
Code: ags
void FancyTypedText.Start(String text);
Sets a new string and resets everything to start typing. You can then use Tick repeatedly to advance the text.

FancyTypedText.Skip
Code: ags
void FancyTypedText.Skip();
Skips all remaining typing of the text.

FancyTypedText.Tick
Code: ags
void FancyTypedText.Tick();
Updates the typed text state, advancing it by a single tick.

FancyTypedText.DrawTyped
Code: ags
void FancyTypedText.DrawTyped(DrawingSurface* surf);
Draws the typed text in it's current state.

FancyTypedText.CreateTypedSprite
Code: ags
DynamicSprite* FancyTypedText.CreateTypedSprite();
Create a sprite of the text being typed.

FancyTypedText.IsTextBeingTyped
Code: ags
attribute readonly bool FancyTypedText.IsTextBeingTyped;
True if a text is being typed in the FancyTypedText, and not finished.
[close]


License
This module is created by eri0o is provided with MIT License, see LICENSE for more details.
SMF spam blocked by CleanTalk